Close up of finished salad.

Sorghum, Apple and Kale Salad

I adapted this salad from a quinoa recipe I found Quinoa salad. The apples and walnuts give this salad a nice, sweet crunch. I added turmeric to the sorghum while it cooked to give it a little extra flavor. I hope you enjoy this easy, nutritious dish!

Ingredients:

  • 2 cups vegetable broth
  • 2 tsp turmeric
  • 2 cups cooked whole grain sorghum
  • 3 medium apples, pealed and diced
  • 3 handfuls finely chopped kale
  • 1 cup onion, chopped
  • 1 cup walnuts, chopped

Dressing:

  • 1/4 cup olive oil
  • 1/4 cup apple cider vinegar
  • 2 Tbsp. maple syrup or honey
  • Juice from 1/2 lemon (about 1/8 cup)
  • 1 tsp cinnamon
  • 1 tsp salt
  • 1/2 tsp black pepper

Soak 1 cup of uncooked, whole grain sorghum in water for 2 hours. Rinse sorghum grains and cook in 2 cups of vegetable broth plus 1 cup of water and 2 teaspoons of turmeric, until liquid is absorbed and sorghum is tender – about 1 hour. Set aside to cool. This will yield about 3 1/2 cups of cooked sorghum. I only used 2 cups of it for this recipe, but feel free to use more if you like.

Cooked sorghum with turmeric in pan.

The turmeric gives the whole grain sorghum a lovely yellow color.

Ingredients for salad on kitchen counter.

While the sorghum was cooking, I prepared the remaining ingredients.

Sauté chopped onion in olive oil with chopped kale until kale is wilted and onions are translucent.

Washed kale in a colander.

Freshly washed kale.

Set aside to cool. Make dressing while onion-kale mixture is cooling.

Sautéed onions and kale added to the cooked sorghum.

Onions and kale were sautéed and added to the cooked sorghum.

Mix cooked sorghum with kale and onion mixture. Add apples, walnuts and dressing.

Sorghum salad with apples and walnuts added in a brown mixing bowl.

Apples and walnuts added.

Chill salad in refrigerator and serve cold.

Sorghum, apple, kale salad in white serving bowl.

I chilled the salad for about 2 hours so it would absorb the flavors of the dressing.

Milo graphic

Milo says….

Maizy said I will get fat if I eat too many treats. Fat sounds like a LOT of FUN to me!


Sice of gluten-free banana zucchini bread on a dessert plate.

Gluten-free Banana-Zucchini Bread

Here is another great recipe from Carol Fenster’s “100 Best Gluten-Free Recipes.” This cookbook truly does have some of the best gluten-free recipes I have tried and a lot of good information, as well.

The original recipe called for three small bananas and I only had two, so I added some shredded zucchini instead. I ended up with a very moist and delicious quick bread that disappeared fast!

Ingredients:

  • 2 large eggs, at room temperature
  • 3/4 cup sugar
  • 2 small, very ripe bananas, mashed
  • 1 cup shredded zucchini
  • 1/3 cup canola oil
  • 1 teaspoon pure vanilla extract
  • 1 1/2 cups Carol’s sorghum blend
  • 1 teaspoon xanthan gum
  • 1/2 teaspoon salt
  • 2 teaspoons baking powder
  • 1 teaspoon ground cinnamon

Optional ingredients:

  • 1/2 cup walnuts, chopped
  • 1/2 cup raisins
  • 2 tablespoons chia seeds

Instructions:

Place rack in middle of oven. Preheat to 350ºF.

Generously grease a nonstick loaf pan. I used olive oil cooking spray.

Beat eggs in medium mixing bowl with electric mixer for 30 seconds. Add sugar and beat until blended. Add mashed banana, zucchini, oil and vanilla. Beat until smooth.

Combine the dry ingredients in a separate bowl. Gradually add the mixture to the liquid ingredients, beating on low speed until thoroughly blended and batter thickens. Stir in walnuts or other optional ingredients, if desired. (I added walnuts.)

Spread evenly in the prepared pan.

Gluten-free banana zucchini bread batter in a baking pan.

I sprayed the pan with a little too much olive oil spray, but it didn’t seem to effect the final outcome.

Bake 45 – 50 minutes, or until a toothpick inserted into the center comes out clean. Cool in pan for 10 minutes, then remove and cool completely on a wire rack. Slice and serve!

Freshly baked banana zucchini bread still in the baking pan.

The bread was nicely browned on top.

Freshly baked banana zucchini bread still in the baking pan.

Close up of sliced end of loaf of gluten-free banana zucchini bread on a plate.

The bread was moist on the inside and not too sticky – in other words, perfect!


Milo graphic

Milo says….

I don’t always bark at MIDNIGHT – but when I do, it’s for no reason.


Close up of two buckwheat sorghum biscuits.

Buckwheat Sorghum Biscuits

Despite it’s name, buckwheat is not related to wheat and is gluten free. It is actually related to sorrel, knotweed and rhubarb. The name ‘buckwheat’ or ‘beech wheat’ comes from its triangular seeds, which resemble the much larger seeds of the beech nut from the beech tree, and the fact that it is used like wheat.

Front of package of Arrowhead Mills Organic Buckwheat Flour.

I used regular milk in these biscuits instead of buttermilk and they turned out a little bit crumbly. I think they would be much better with the buttermilk. The buckwheat flour gives these biscuits a hearty flavor and whole-grain texture. These are really good with a little gluten-free cream gravy on top!

Ingredients:

  • 3/4 cup buckwheat flour
  • 1/2 cup sorghum flour
  • 1/2 cup tapioca starch
  • 1/2 cup potato starch
  • 1 tsp xanthan gum
  • 1/2 tsp salt
  • 1 T baking powder
  • 1 tsp baking soda
  • 1/2 cup butter, chilled
  • 1 cup buttermilk

Instructions:

Preheat oven to 425º F. In a large mixing bowl, mix together all of the dry ingredients.

Dry ingredients mixed together in a white bowl.

Dry ingredients mixed together – buckwheat flour has a dark brown color.

Cut the butter into small pieces and use a pastry cutter to mix it into the dry ingredients.

Dry ingredients with blobs of butter mixed in.

I used a pastry cutter to blend the butter into the flour mixture.

Add the buttermilk and use a large spoon to mix well. The dough will be thick and sticky.

Buckwheat sorghum biscuit dough in a white bowl.

Add buttermilk and mix until a thick, sticky dough is formed.

For drop biscuits, use floured or moistened hands to form balls of dough and place them on a cooking sheet.

Baking sheet with 14 balls of dough ready to bake.

I moistened my hands with water to form the balls of dough. You can also use flour to coat your hands or to roll the dough out for cutting.

Buckwheat sorghum dough formed into balls on baking sheet.

Bake for 15 minutes at 425º F.
Makes about a dozen 3″ biscuits.

Baked buckwheat sorghum biscuits on baking sheet.

Baked biscuits – crispy on the outside, soft on the inside.

Two buckwheat sorghum biscuits on a small plate with a butter dish and a stick of butter in the background.

Two buckwheat sorghum biscuits cut open with butter on a small plate.

The biscuits were a tad crumbly – possibly because I used regular milk instead of buttermilk.

Recipe from Janice Mansfield


Milo graphic

Milo says….

Oh, to be at the dog park, now that June is here!


Four gluten free pancakes on a white plate with syrup and fresh blueberries.

Gluten Free Pancake Mix Review

This week I’m reviewing two gluten-free pancake mixes that contain sorghum flour. Both of them were very good, and they each had a unique flavor and appeal.

Hodgson Mills Gluten Free Pancake Mix is a whole grain, hearty mix with flax seeds.

Front of Hodgson Mill Gluten Free Pancake Mix box.

Hodgson Mill has a nice traditional design on their box with all the pertinent information.

Side of Hodgson Mill pancake mix box showing the ingredients.

Hodgson Mill has less sugar and additives in their mix and more whole grains.

I added fresh Texas blueberries to make these pancakes extra healthy and just plain yummy.

Washed blueberries on a paper towel.

Fresh Texas blueberries.

I used buttermilk and the batter came out very thick. I had to use a spoon to spread the batter out on the grill so they would be thin enough to cook completely inside. I think I would have liked them better if I had added a bit more milk to the thin out the batter.

Metal mixing bowl containing pancake batter with blueberries stirred into it.

The Hodgson Mill batter was a bit thick – I should have added a little more milk.

Four blutberry pancakes cooking on a griddle.

If the batter is thick, be sure to spread it out with a spoon on the griddle so the pancakes will not be to tall and cook well in the middle.

Stack of gluten free blueberry pancakes on a white plate.

Finished stack of Hodgson Mill Gluten Free blueberry pancakes.


The other day I found this new gluten-free pancake mix I had never seen before – Kerbey Lane Cafe Gingerbread Pancake Mix.

Front of box of Kerbey Lane Gingerbread Pancake Mix. It has cartoon image of a gingerbread man flipping pancakes.

Kerbey Lane Cafe has several locations in the Austin, TX area. I think they’re packaging has a fun design.

The package was really cute and when I turned it over to read the ingredients I was amazed to see sorghum flour was the first ingredient!

Side of Kerbey Lane pancake mix box showing ingredient list.

Sorghum flour is listed as the first ingredient.

They also had a fun slogan on the side:

The side of the Kerbey pancake mix box has the slogan Peace Through Pancakes and graphic of flying pancakes above their allergen information.

Peace Through Pancakes – I’m all for that! Love those flying pancakes.

So, I HAD to try this, right?

Kerbey Lane Cafe is actually a small restaurant chain in Austin, TX that also produces packaged products for retail. I found this mix at Drug Emporium. You can buy them online, too. They have regular and gluten-free mixes. The gluten-free ones are manufactured in a dedicated facility, according to the package, so that made me feel safe trying the product.

The Kerbey Lane mix has everything in it, so all you have to add are eggs and water.

White mixing bowl containing Kerbey gingerbread pancake batter.

Kerbey Lane Gingerbread pancake batter.

The pancakes looked and smelled like soft gingerbread cookies while they were cooking.

Four gingerbread pancakes cooking on a griddle.

The Kerbey Lane pancakes look like big fluffy gingerbread cookies when they are cooking.

And they tasted as good as they smelled!

Four gingerbread pancakes stacked on a plate.

Kerbey Lane Cafe gluten free gingerbread pancakes.

I added a small amount of butter and maple syrup, but these might also be good with fruit and whipped cream. The texture was just like I remember real pancakes being.

I would definitely recommend either one of these mixes to my celiac friends.

Remember: Peace Through Pancakes!


Milo graphic

Milo says….

Life’s most persistent and urgent question is, “What’s for breakfast?”


Whole grain sorghum pilaf with toasted corn in a serving bowl with Parmesan cheese sprinkled on top.

Sorghum Pilaf with Pan-Roasted Corn

Here is another whole grain sorghum recipe developed by Barbara Kliment of the Nebraska Grain Sorghum Board. I added chopped kale to the recipe to give it more color and just because I love kale.

Metal bowl containing chopped up kale.

I added chopped kale to add color to this dish.

I soaked my sorghum for two hours before cooking, which made it a little softer and more sticky. I cooked the sorghum for about an hour until all of the broth was absorbed. I think I could have taken 10 minutes off of the cooking time and drained off the excess broth and the texture of the sorghum would have been a bit better.

The chicken broth gives the whole grain sorghum a nice flavor and the almonds give this pilaf a very pleasing crunch. Enjoy this pilaf as a meal by itself or as a side dish.

Ingredients:

  • 1 cup uncooked pearled sorghum
  • 4 cups chicken broth
  • 1 ½ Tbsp. olive oil
  • 2 cups fresh or frozen corn
  • 1 cup carrots, sliced thin
  • ½ cup celery, sliced
  • ½ cup onion, diced
  • 2 cups kale, chopped (optional)
  • 1 clove garlic, minced
  • ½ cup slivered almonds
  • ½ cup Parmesan cheese, shredded or grated
  • salt and pepper to taste

Instructions:

Package of chicken broth next to rinsed sorghum grains in a strainer.

The whole grain sorghum absorbs the flavor of the chicken broth.

Rinse and drain sorghum grains. Bring chicken broth to a boil in a 3-quart saucepan, add sorghum and simmer for 45 to 50 minutes, until tender. Drain off any excess broth and set pan aside.

Cooked whole grain sorghum in a saucepan.

I cooked the sorghum until it absorbed all of the chicken broth (about an hour) and it was a little bit mushy.

While the sorghum is cooking, chop the vegetables. Measure out two cups of frozen corn and let it sit out to thaw. I didn’t have slivered almonds so I chopped up some whole almonds in my food processor.

Corn and almonds in measuring cups next to bowl of cut of carrots, celery and onions.

Chopped vegetables, almonds and frozen corn.

Heat olive oil in a large skillet. Add corn and cook until toasted.

Corn sautéing in a skillet.

Sauté the corn in a skillet in olive oil until it starts to brown a little.

Add onion, garlic, celery and carrots and sauté until onions are translucent, 3 – 5 minutes. Add salt and pepper to season to taste.

Carrots, onions, celery and garlic added to the sautéed corn in skillet.

The rest of the vegetables are sautéed with the toasted corn.

Add chopped kale, cover and steam for 2 minutes.

Skillet containing vegetables with glass cover on top.

I covered the skillet after adding the chopped kale to let it steam for a few minutes.

Add almonds, cover and cook for 2-3 more minutes, until nuts begin to toast.

Vegetables and almonds mixed together in skillet.

I steamed the kale until it was wilted (about 3 minutes) and then added the almonds.

Add cooked sorghum and heat through, adding extra broth if the mixture looks too dry. Add cheese and stir until melted.

Skillet containing cooked vegetables, whole grain soghum and parmesan cheese.

Cooked sorghum is added to the vegetables, warmed up, and then the Parmesan cheese is added.

Remove pilaf from heat and pour into serving dish or platter. Garnish with additional cheese and almonds, if you like.

Plastic container of grated Parmesan cheese.

You can use shredded or grated Parmesan cheese.


Milo graphic

Milo says….

I try to go through life with my ears held high and my nose down low so I don’t miss the important things.


Close up of gluten-free chocolate muffin on a dessert plate with white chocolate drizzeled over the top.

Gluten-Free Triple Chocolate Muffins

Here is an amazing chocolate muffin recipe from Carol Fenster’s book “100 Best Gluten-Free Recipes”.  It’s a chocolate muffin with chocolate chips and white chocolate drizzled over the top. I could hardly believe these muffins were gluten-free!

In the book, it says this recipe makes 12 muffins, but I got 19.

Be careful eating these – they are very addictive!

Ingredients

Drizzle

  • 1/2 cup chopped gluten-free white chocolate, melted
  • 1 to 2 tablespoons milk of choice

Instructions

Preheat the oven to 375º F. Grease muffin pan cups or line with paper liners.

To make the muffins: Beat the eggs with an electric mixer on low speed 30 seconds. Add milk, oil, and vanilla and continue beating on low speed until just blended.

Eggs, milk and vanilla mixed together.

Eggs, milk, oil and vanilla mixed together.

In a small bowl, whisk together the sorghum blend, sugar, cocoa, xanthan gum, baking soda and salt.

Dry ingredients mixed together in metal mixing bowl.

Dry ingredients mixed together.

Gradually beat the flour mixture into the liquid ingredients until the batter is smooth and slightly thickened, about 1 to 2 minutes.

Gluten-free chocolate muffin batter in a mixing bowl.

The batter is smooth and creamy.

Stir in the chocolate chips and almonds.

Gluten-free chocolate muffin batter with chocolate chips and almonds stirred in.

The nuts and chocolate chips added to the batter.

Divide the batter evenly in the muffin pan.

Two muffin pans containing chocolate batter.

I got 19 muffins out of this recipe.

Bake 20 to 25 minutes on a rack in the middle of the oven until the muffin tops are firm, or until a toothpick inserted into the center of the muffin comes out clean. Let the muffins cool in the pan for 10 minutes, then take them out to cool another 5 minutes.

Close up of baked chocolate muffin - the top goes about an inch above the edge of the muffin pan.

The muffins rose quite a bit during baking.

Close up of baked chocolate muffin in muffin pan.

Chocolatey goodness!

To make the drizzle: Combine melted white chocolate and 1 tablespoon of milk to make a thin smooth frosting. Add more milk a little at a time if needed. Drizzle the white chocolate mixture over the tops of the muffins.

Close up from above of several gluten-free chocolate muffins on a plate with white chocolate drizzeled over the tops.

White chocolate drizzled over the tops – yum!

Close up from above of several gluten-free chocolate muffins on a plate with white chocolate drizzeled over the tops.


Close up from above of one gluten-free chocolate muffin on a plate with white chocolate drizzeled over the top.

You can’t go wrong with triple the chocolate!


Milo graphic

Milo says….

A stranger is just a friend waiting to be sniffed!


Finished sorghum chicken casserole in a bowl.

Cheesy Sorghum Chicken Casserole

Here is another recipe using whole grain sorghum. The green chilies and red pepper flakes give it just a little bit of spicy kick that is absorbed by the whole grain sorghum. I got the idea for the recipe here, but I changed it up a bit.

Here’s a fun little video about whole grain sorghum from Bob’s Red Mill.

I soaked the sorghum for several hours, then cooked it ahead of time in vegetable broth, just like in my pea salad recipe. I hope you enjoy this healthy, spicy recipe!

Ingredients

  • 6 strips of bacon, fried and crumbled into pieces
  • 1 tablespoon extra virgin olive oil
  • 1 white onion, chopped
  • 1 clove of garlic, minced
  • 3 green onions, chopped
  • 1 large tomato, chopped
  • 1 8oz. can tomato sauce
  • dash of red pepper flakes
  • salt & pepper
  • 2 cups cooked & shredded chicken breast
  • 2 cups cooked whole grain sorghum
  • 1 red bell pepper, chopped
  • 1 small can of Hatch diced green chilies
  • 1/2 cup kale, chopped
  • 2 cups grated sharp cheddar cheese, divided

Instructions

Cook the whole grain sorghum ahead of time (instructions here).

Whole grain sorghum in a 2-cup glass measuring cup.

I cooked the whole grain sorghum ahead of time in vegetable broth.

Preheat oven to 375 degrees F and spray a 7 × 9 baking dish with no-stick olive oil spray.

Chopped red bell pepper and green onions on a cutting board with other ingredients lined up behind.

While the whole grain sorghum was cooking, I chopped up the vegetables.

Fry the bacon and set aside to cool. Remove some of the bacon grease and cook the chicken breast in the same pan until cooked through. Cut chicken into bite-sized pieces.

Chopped up cooked chicken breast on a cutting board.

After frying the bacon, I cooked the chicken breast in the same frying pan and then chopped it up into bite-sized bits.

In the same skillet, over medium-high heat, add olive oil, garlic and white and green onions. Sauté for 2-3 minutes.

Chopped onions and garlic in a frying pan with olive oil.

After cooking the bacon and chicken, I used the same pan to sauté the onion and garlic.

Add chopped tomato, tomato sauce, red pepper flakes and salt & pepper. Stir and simmer for 5-7 minutes.

Tomatoes, sauce, onions, peppers and garlic in a frying pan.

The tomatoes and tomato sauce are added to the sautéed onion and garlic, plus a couple of shakes of red pepper flakes.

Meanwhile, combine sorghum, chicken, crumbled bacon, red bell pepper, green chilies, kale and 1 cup of the cheddar cheese in a large bowl. Season with salt & pepper to taste.

Chicken mixed with vegetables and sorghum in a large bowl.

Chicken, bell pepper, green chilies, kale and cooked whole grain sorghum, plus 1 cup of shredded cheese.

Add tomato sauce mixture to the bowl and toss to combine.

Pour mixture to the baking dish.

Casserole dish containing all ingredients mixed together.

After combining all the ingredients, adding more shredded cheese on top is all that is left.

Top with remaining cheddar cheese and cover with foil.

Bake for 15 minutes. Remove foil and bake for another 10 minutes.

Remove from oven and garnish with additional green onions, if you like.

Sorghum chicken casserole in a bowl, melted cheese on top.

Finished casserole ready to taste.


Makes 4-6 servings.

Milo graphic

Milo says….

Keep an open mind – not everyone smells life the same way.


Slice of gluten-free rosemary focaccia on a plate, golden brown on top with melted Parmesan cheese.

Gluten-Free Rosemary Focaccia

Here’s another recipe from Gluten-Free Quick & Easy. I had some of Carol’s Yeast Bread Mix left over from the dinner rolls I made a couple of weeks ago, so I decided to try another yeast bread recipe.

Focaccia is a type of flatbread, almost like a thick pizza crust. I topped this one with Parmesan cheese and rosemary, but you can try any seasonings and/or any cheese you like.

This is a very flavorful bread and is good dipped in olive oil. It can be sliced in half for sandwiches or used for a thick-crust pizza.

Bread Ingredients:

  • 1 tablespoon active dry yeast
  • 2 cups Carol’s Yeast Bread Mix
  • 1/2 teaspoon dried rosemary
  • 1/2 teaspoon onion powder
  • 2/3 cup warm (110 degrees F) 1% milk (cow’s, rice, soy, potato or nut – I used almond)
  • 2 tablespoons olive oil
  • 1 teaspoon cider vinegar

Topping:

  • 2 tablespoons olive oil
  • 1/4 teaspoon dried rosemary, crushed
  • 1/4 teaspoon kosher or coarse sea salt, or to taste
  • 2 tablespoons grated Parmesan cheese

Instructions:

Combine all the bread ingredients in a food processor (I used a large spoon and it worked just fine.) Process the ingredients until they are thoroughly blended. The dough will be soft and sticky.

Gluten-free focaccia dough in white mixing bowl with spoon.

The dough was very soft and sticky.

Transfer the dough to a 7 x 11-inch nonstick cake pan that is generously greased with olive oil. Using a wet spatula, spread the dough evenly in the pan.

Gluten-free focaccia dough spread out in the bottom of a non-stick cake pan.

The dough covered the bottom of the cake pan and was about 1/2-inch thick.

Cover the dough loosely with foil and let it rise in a warm place (75 to 80 degrees F) 45 to 50 minutes, or until the dough is about ½ inch below the top of the pan. The dough will rise further during baking.

Rosemary focaccia dough in baking pan, puffed up about 1.5 inches.

My dough didn’t rise very much – I think it wasn’t warm enough in my kitchen.

Preheat the oven to 375 degrees F. For the topping, drizzle the oil over the dough and tilt the pan to distribute evenly. Sprinkle evenly with the rosemary and salt.

Bake 30 to 35 minutes, or until the crust is golden brown and clicks when tapped with a spoon. Cover the bread with foil if the top browns too quickly. Remove from the oven and immediately sprinkle with the Parmesan cheese. Let cool in the pan 10 minutes, then cut into 10 slices. Serve warm or at room temperature.

Baked rosemary focaccia in baking pan covered with grated Parmesan cheese.

I took the focaccia out of the oven after 25 minutes, put the cheese on and cooked it for five more minutes. I used more than two tablespoons of cheese, I think.


Milo graphic

Milo says….

There is no sense in doing a lot of barking if you don’t really have anything to say.

Gluten-free pea salad with whole grain sorghum on a plate with bbq ribs.

Gluten-free Sorghum Pea Salad

The weather is getting warmer and it’s time to start thinking about good picnic salads. For this recipe, I took a traditional pea salad and added whole grain sorghum – and bacon, of course! I also added tomatoes to make it more colorful. This was so good I could have eaten it for the whole meal! I hope you enjoy it, too.

Cooking whole grain sorghum:

  • 1 cup dry whole grain sorghum
  • 1 cup water
  • 1 cup vegetable broth

Soak whole grain sorghum in water for 3-4 hours. Drain and rinse.

Uncooked whole grain sorghum covered with water in a metal bowl.

I soaked the sorghum grains for about 4 hours so they would cook faster and be more tender.

Place soaked sorghum, water and vegetable broth in sauce pan.

8 oz package of Pacific organic vegetable stock.

I cooked the whole grain sorghum in vegetable stock to give it a richer flavor.

Bring to boil, reduce heat and simmer 45 minutes, until sorghum is tender and all liquid is absorbed.

Yields 4 cups of cooked sorghum.

Cooked whole grain sorghum in a white bowl.

Cooked sorghum ready to add to salad mixture.

Ingredients for salad:

  • 2 cups cooked whole grain sorghum
  • 1 10-oz package frozen sweet green peas
  • 6 slices bacon, fried and crumbled into bits
  • 1/2 cup celery, chopped
  • 1/2 cup onion, chopped
  • 4 hard boiled eggs, chopped
  • 1 cup sharp cheddar cheese, cubed
  • 2 cups grape tomatoes, each cut in half
  • 1 cup mayonnaise
  • 1/2 tsp black pepper
  • 1/2 tsp garlic powder

Instructions:

Soak and cook whole grain sorghum according to directions above. While sorghum is cooking, fry the bacon, cook peas and boil the eggs.

Package of frozen Cascadian Farm organic sweet peas.

The frozen peas are cooked and set aside to cool.

Cooked bacon and chopped up hard boiled eggs on a cutting board with cup of mayonnaise sitting behind.

Bacon and chopped up hard boiled eggs.

Set everything aside to cool and cut up vegetables and cheese.

Chopped onion and celery in a metal bowl.

Chopped onion and celery

Plastic measuring cup containing cubed cheddar cheese.

I like sharp cheddar cheese, but you can use any cheese that you like.

Two-cup glass measuring cup filled to brim with grape tomato halves.

Grape tomatoes sliced in half.

Chop up cooled eggs into bite-sized bits. Combine all ingredients in a large bowl.

Cooked peas added to whole grain sorghum in a white mixing bowl.

Cooked peas added to whole grain sorghum.

Pea salad mixture with tomatoes added.

All ingredients combined, except mayonnaise.

Front of jar of Hellmann's mayonnaise.

This mayo has always been gluten-free and is great in pea salad.

Finished pea salad with mayonnaise added.

Finished salad with mayonnaise added.

Cover and place in refrigerator for at least 1 hour. Serve cold. Makes 6-8 servings.


Milo graphic

Milo says….

I think spring is coming – the frisbies are in bloom!


Two dinner rolls on a small plate, one is split open with butter melting on it.

Gluten-Free Yeast Dinner Rolls

Today’s recipe is from Carol Fenster’s Gluten-Free Quick & Easy cookbook. Her gluten-free yeast bread mix makes about 12 3/4 cups of flour mix, enough for four or five recipes. It can be stored in a dry, dark place for a few months in a sealed container.

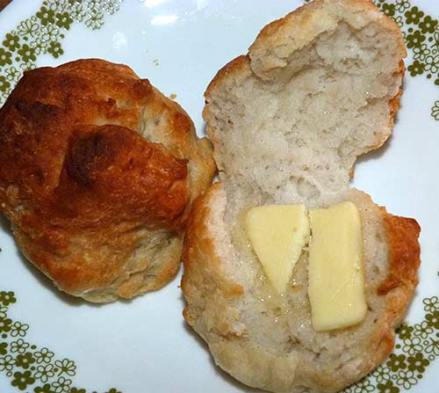
These rolls were amazing – especially fresh out of the oven while still warm. I also enjoyed the leftover ones warmed up in the toaster oven. They were not gummy on inside like a lot of gluten-free breads.

The recipe calls for guar gum, in addition to xanthan gum. I didn’t have any guar gum, so I put in two extra teaspoons of xanthan gum. It called for four teaspoons of guar gum, but I was afraid four extra teaspoons of xanthan gum would make the rolls too gummy on the inside.

Carol Fenster recommends mixing the dough in a food processor. My food processor isn’t big enough to do this, so I used a large spoon to mix everything and it worked just fine.

I definitely recommend these rolls to all my friends with celiac disease. When fresh and warm they are one of the closest gluten-free options I have found to “real” bread.

Start by making a batch of Carol’s Sorghum Flour Blend:

  • 1 1/2 cups sorghum flour
  • 1 1/2 cups potato starch (not potato flour) or cornstarch
  • 1 cup tapioca flour/starch

Whisk together thoroughly and store, tightly covered, in a dark, dry, cool place.

Next, make Carol’s Yeast Bread Mix:

  • 8 cups potato starch
  • 4 cups Carol’s Sorghum Flour blend
  • 8 tablespoons cane sugar
  • 8 teaspoons xanthan gum
  • 6 teaspoons table salt
  • 4 teaspoons guar gum (I substituted 2 teaspoons of xanthan gum)

Whisk or sift all ingredients together until thoroughly combined. Or you can put it in a container with a tight-fitting lid and shake it for 2 or 3 minutes until combined. Store unused mix in a dark, dry place in a covered container.

Brown mixing bowl almost full of flour mix with whisk.

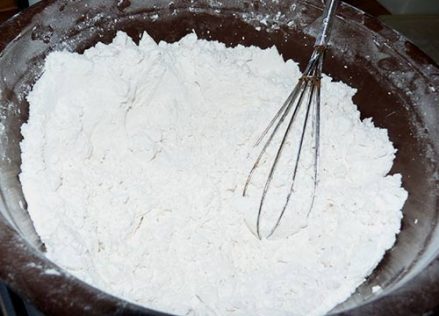
Carol’s yeast bread mix makes a lot of flour mix that you can store for future use.

Dinner Rolls

Ingredients:

  • 2/3 cup warm (110 degree F) 1% milk (cow’s, rice, soy, potato or nut)
  • 1 envelop (2 1/4 teaspoons) active dry yeast
  • 3 large egg whites (1/2 cup), at room temperature
  • 1/4 cup (1/2 stick) unsalted butter or buttery spread, Earth Balance, Soy Garden, melted, or canola oil
  • 1 teaspoon cider vinegar
  • 3 cups Carol’s Yeast Bread Mix (see recipe above)
  • Oil or butter, for brushing after baking (optional)

Instructions:

Generously grease a 7 x 11-inch nonstick (gray, not black) cake pan; set aside.

Place the warm milk in the bowl of a food processor. Add the yeast and let stand while measuring the other ingredients. (I combined them in a small mixing bowl and set aside).

Add the remaining ingredients to the food processor and process until thoroughly blended. (I mixed with a large spoon in a mixing bowl).

Gluten-free yeast bread dough in white mixing bowl with spoon stuck in it.

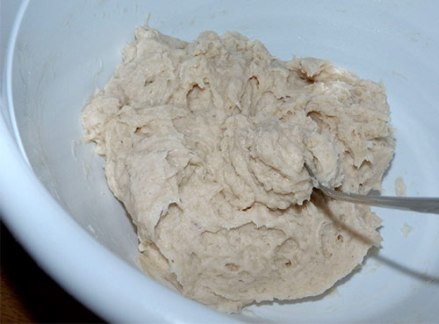
The dough is very sticky.

Using a 1 1/2-inch spring-action ice cream scoop, form 18 uniform-sized pieces of dough (I used a large spoon). With oiled or wet hands, shape each scoop into a smooth ball and arrange in three rows of six for a total of 18 balls. The balls will be close together. I got 14 balls, so I might have made them a tad large.

Baking tray with 14 balls of gluten-free yeast dough for rolls.

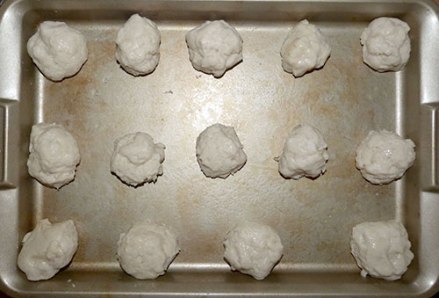
I wet my hands to smooth out each dough ball.

Cover the pan loosely with foil and let the dough rise in a warm place (75 to 80 degrees F) for 45 to 60 minutes, until level with the top of the pan.

Top of white refrigerator with foil-covered tray of dinner roll dough.

I covered the dough balls with foil and put them on top of the refrigerator to rise.

Baking tray with larger dough balls.

After sitting on the refrigerator for an hour, the dough balls had doubled in size.

Preheat oven to 375 degrees F. Bake 25 to 30 minutes, or until the rolls are lightly browned and firm to the touch. If the rolls brown too quickly, cover loosely with foil. Remove from the pan and let cool 10 minutes on wire rack. Brush with melted butter or oil for a glossier look, if desired. Serve warm.

Baked gluten-free dinner rolls on baking tray.

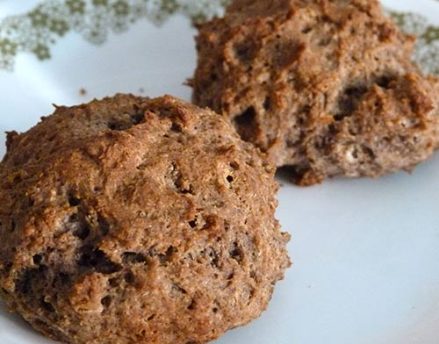
The rolls were a lovely golden brown when I took them out of the oven.

Close up shot of a few of the baked rolls on the tray.

Crispy on the outside fluffy on the inside!

The dough can be refrigerated overnight after rising, if you want to make them the day before.

Baked rolls can be frozen, then reheated in the microwave on low or in a toaster oven wrapped in foil.

Two dinner rolls on a small plate, one is split open with butter melting on it.

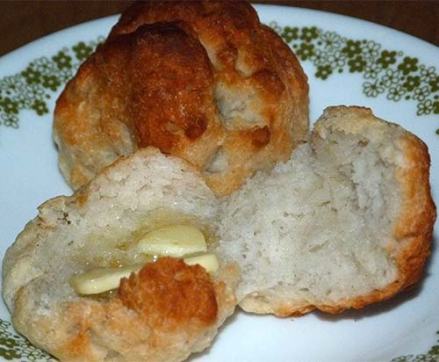
The rolls were fluffy inside without being sticky or gummy.


Milo graphic

Milo says….

If you can’t dance, do a happy hop!